Lecture 7
Introduction
- So far, we’ve discussed how to build simple web pages using HTML and CSS, and how to use Git and GitHub in order to keep track of changes to our code and collaborate with others. We also familiarized ourselves with the Python programming language, started using Django to create web applications, and learned how to use Django models to store information in our sites. We then introduced JavaScript and learned how to use it to make web pages more interactive, and talked about using animation and React to further improve our User Interfaces.
- Today, we’ll learn about best practices when if comes to working on and launching larger projects.
Testing
One important part of the software development process is the act of Testing the code we’ve written to make sure everything runs as we expect it to. In this lecture, we’ll discuss several ways that we can improve the way we test our code.
Assert
One of the simplest ways we can run tests in Python is by using the assert command. This command is followed by some expression that should be True. If the expression is True, nothing will happen, and if it is False, an exception will be thrown. Let’s look at how we could incorporate command to test the square function we wrote when first learning Python. When the function is written correctly, nothing happens as the assert is True
def square(x):
    return x * x

assert square(10) == 100

""" Output:

"""
And then when it is written incorrectly, an exception is thrown.
def square(x):
    return x + x

assert square(10) == 100

""" Output:
Traceback (most recent call last):
  File "assert.py", line 4, in <module>
    assert square(10) == 100
AssertionError
"""
Test-Driven Development
As you begin building larger projects, you may want to consider using test-driven development, a development style where every time you fix a bug, you add a test that checks for that bug to a growing set of tests that are run every time you make changes. This will help you to make sure that additional features you add to a project don’t interfere with your existing features.
Now, let’s look at a slightly more complex function, and think about how writing tests can help us to find errors. We’ll now write a function called is_prime that returns True if and only if its input is prime:
import math

def is_prime(n):

    # We know numbers less than 2 are not prime
    if n < 2:
        return False

    # Checking factors up to sqrt(n)
    for i in range(2, int(math.sqrt(n))):

        # If i is a factor, return false
        if n % i == 0:
            return False

    # If no factors were found, return true
    return True
Now, let’s take a look at a function we’ve written to test our prime function:
from prime import is_prime

def test_prime(n, expected):
    if is_prime(n) != expected:
        print(f"ERROR on is_prime({n}), expected {expected}")
At this point, we can go into our python interpreter and test out some values:
>>> test_prime(5, True)
>>> test_prime(10, False)
>>> test_prime(25, False)
ERROR on is_prime(25), expected False
We can see from the output above that 5 and 10 were correctly identified as prime and not prime, but 25 was incorrectly identified as prime, so there must be something wrong with our function. Before we look into what is wrong with our function though, let’s look at a way to automate our testing. One way we can do this is by creating a shell script, or some script that can be run inside our terminal. These files require a .sh extension, so our file will be called tests0.sh. Each of the lines below consists of
- A
python3to specify the Python version we’re running - A
-cto indicate that we wish to run a command - A command to run in string format
python3 -c "from tests0 import test_prime; test_prime(1, False)"
python3 -c "from tests0 import test_prime; test_prime(2, True)"
python3 -c "from tests0 import test_prime; test_prime(8, False)"
python3 -c "from tests0 import test_prime; test_prime(11, True)"
python3 -c "from tests0 import test_prime; test_prime(25, False)"
python3 -c "from tests0 import test_prime; test_prime(28, False)"
Now we can run these commands by running ./tests0.sh in our terminal, giving us this result:
ERROR on is_prime(8), expected False
ERROR on is_prime(25), expected False
Unit Testing
Even though we were able to run tests automatically using the above method, we still might want to avoid having to write out each of those tests. Thankfully, we can use the Python unittest library to make this process a little bit easier. Let’s take a look at what a testing program might look like for our is_prime function.
# Import the unittest library and our function
import unittest
from prime import is_prime

# A class containing all of our tests
class Tests(unittest.TestCase):

    def test_1(self):
        """Check that 1 is not prime."""
        self.assertFalse(is_prime(1))

    def test_2(self):
        """Check that 2 is prime."""
        self.assertTrue(is_prime(2))

    def test_8(self):
        """Check that 8 is not prime."""
        self.assertFalse(is_prime(8))

    def test_11(self):
        """Check that 11 is prime."""
        self.assertTrue(is_prime(11))

    def test_25(self):
        """Check that 25 is not prime."""
        self.assertFalse(is_prime(25))

    def test_28(self):
        """Check that 28 is not prime."""
        self.assertFalse(is_prime(28))


# Run each of the testing functions
if __name__ == "__main__":
    unittest.main()
Notice that each of the functions within our Tests class followed a pattern:
- The name of the functions begin with
test_. This is necessary for the functions to be run automatically with the call tounittest.main(). - Each test takes in the
selfargument. This is standard when writing methods within Python classes. - The first line of each function contains a docstring surrounded by three quotation marks. These are not just for the code’s readability. When the tests are run, the comment will be displayed as a discription of the test if it fails.
- The next line of each of the functions contained an assertion in the form
self.assertSOMETHING. There are many different assertions you can make includingassertTrue,assertFalse,assertEqual, andassertGreater. You can find these ones and more by checking out the documentation.
Now, let’s check out the results of these tests:
...F.F
======================================================================
FAIL: test_25 (__main__.Tests)
Check that 25 is not prime.
----------------------------------------------------------------------
Traceback (most recent call last):
  File "tests1.py", line 26, in test_25
    self.assertFalse(is_prime(25))
AssertionError: True is not false

======================================================================
FAIL: test_8 (__main__.Tests)
Check that 8 is not prime.
----------------------------------------------------------------------
Traceback (most recent call last):
  File "tests1.py", line 18, in test_8
    self.assertFalse(is_prime(8))
AssertionError: True is not false

----------------------------------------------------------------------
Ran 6 tests in 0.001s

FAILED (failures=2)
After running the tests, unittest provides us with some useful information about what it found. In the first line, it gives us a series of .s for successes and Fs for failures in the order our tests were written.
...F.F
Next, for each of the tests that failed, we are then given the name of the function that failed:
FAIL: test_25 (__main__.Tests)
the descriptive comment we provided earlier:
Check that 25 is not prime.
And a traceback for the exception:
Traceback (most recent call last):
  File "tests1.py", line 26, in test_25
    self.assertFalse(is_prime(25))
AssertionError: True is not false
And finally, we are given a run through of how many tests were run, how much time they took, and how many failed:
Ran 6 tests in 0.001s

FAILED (failures=2)
Now let’s take a look at fixing the bug in our function. It turns out that we need to test one additional number in our for loop. For example, when n is 25, the square root is 5, but when that is one argument in the range function, the for loop terminates at the number 4. Therefore, we can simply change the header of our for loop to:
for i in range(2, int(math.sqrt(n)) + 1):
Now, when we run the tests again using our unit tests, we get the following output, indicating that our change fixed the bug.
......
----------------------------------------------------------------------
Ran 6 tests in 0.000s

OK
These automated tests will become even more useful as you work to optimize this function. For example, you might want to use the fact that you don’t need to check all integers as factors, just smaller primes (if a number is not divisible by 3, it is also not divisible by 6, 9, 12, …), or you may want to use more advanced probabilistic primality tests such as the Fermat and Miller-Rabin primality tests. Whenever you make changes to improve this function, you’ll want the ability to easily run your unit tests again to make sure your function is still correct.
Django Testing
Now, let’s look at how we can apply the ideas of automated testing when creating Django applications. While working with this, we’ll be using the flights project we created when we first learned about Django models. We’re first going to add a method to our Flight model that verifies that a flight is valid by checking for two conditions:
- The origin is not the same as the destination
- The duration is greater than 0 minutes
Now, our model could look something like this:
class Flight(models.Model):
    origin = models.ForeignKey(Airport, on_delete=models.CASCADE, related_name="departures")
    destination = models.ForeignKey(Airport, on_delete=models.CASCADE, related_name="arrivals")
    duration = models.IntegerField()

    def __str__(self):
        return f"{self.id}: {self.origin} to {self.destination}"

    def is_valid_flight(self):
        return self.origin != self.destination or self.duration > 0
In order to make sure our application works as expected, whenever we create a new application, we are automatically given a tests.py file. When we first open this file, we see that Django’s TestCase library is automatically imported:
from django.test import TestCase
One advantage to using the TestCase library is that when we run our tests, an entirely new database will be created for testing purposes only. This is helpful because we avoid the risk of accidentally modifying or deleting existing entries in our databse and we don’t have to worry about removing dummy entries that we created only for testing.
To start using this library, we’ll first want to import all of our models:
from .models import Flight, Airport, Passenger
And then we’ll create a new class that extends the TestCase class we just imported. Within this class, we’ll define a setUp function that will be run at the start of the testing process. In this function, we’ll probably want to create. Here’s what our class will look like to start:
class FlightTestCase(TestCase):

    def setUp(self):

        # Create airports.
        a1 = Airport.objects.create(code="AAA", city="City A")
        a2 = Airport.objects.create(code="BBB", city="City B")

        # Create flights.
        Flight.objects.create(origin=a1, destination=a2, duration=100)
        Flight.objects.create(origin=a1, destination=a1, duration=200)
        Flight.objects.create(origin=a1, destination=a2, duration=-100)
Now that we have some entries in our testing database, let’s add some functions to this class to perform some tests. First, let’s make sure our departures and arrivals fields work correctly by attempting to count the number of departures (which we know should be 3) and arrivals (which should be 1) from airport AAA:
def test_departures_count(self):
    a = Airport.objects.get(code="AAA")
    self.assertEqual(a.departures.count(), 3)

def test_arrivals_count(self):
    a = Airport.objects.get(code="AAA")
    self.assertEqual(a.arrivals.count(), 1)
We can also test the is_valid_flight function we added to our Flight model. We’ll begin by asserting that the function does return true when the flight is valid:
def test_valid_flight(self):
    a1 = Airport.objects.get(code="AAA")
    a2 = Airport.objects.get(code="BBB")
    f = Flight.objects.get(origin=a1, destination=a2, duration=100)
    self.assertTrue(f.is_valid_flight())
Next, let’s make sure that flights with invalid destinations and durations return false:
def test_invalid_flight_destination(self):
    a1 = Airport.objects.get(code="AAA")
    f = Flight.objects.get(origin=a1, destination=a1)
    self.assertFalse(f.is_valid_flight())

def test_invalid_flight_duration(self):
    a1 = Airport.objects.get(code="AAA")
    a2 = Airport.objects.get(code="BBB")
    f = Flight.objects.get(origin=a1, destination=a2, duration=-100)
    self.assertFalse(f.is_valid_flight())
Now, to run our tests, we’ll run python manage.py test. The output for this is almost identical to the output we saw while using the Python unittest library, although it also logs that it is creating and destroying a testing database:
Creating test database for alias 'default'...
System check identified no issues (0 silenced).
..FF.
======================================================================
FAIL: test_invalid_flight_destination (flights.tests.FlightTestCase)
----------------------------------------------------------------------
Traceback (most recent call last):
  File "/Users/cleggett/Documents/cs50/web_notes_files/7/django/airline/flights/tests.py", line 37, in test_invalid_flight_destination
    self.assertFalse(f.is_valid_flight())
AssertionError: True is not false

======================================================================
FAIL: test_invalid_flight_duration (flights.tests.FlightTestCase)
----------------------------------------------------------------------
Traceback (most recent call last):
  File "/Users/cleggett/Documents/cs50/web_notes_files/7/django/airline/flights/tests.py", line 43, in test_invalid_flight_duration
    self.assertFalse(f.is_valid_flight())
AssertionError: True is not false

----------------------------------------------------------------------
Ran 5 tests in 0.018s

FAILED (failures=2)
Destroying test database for alias 'default'...
We can see from the above output that there are times when is_valid_flight returned True when it should have returned False. We can see, upon further inspection of our function, that we made the mistake of using or instead of and, meaning that only one of the flight requirements must be filled for the flight to be valid. If we change the function to this:
 def is_valid_flight(self):
    return self.origin != self.destination and self.duration > 0
We can then run the tests again with better results:
Creating test database for alias 'default'...
System check identified no issues (0 silenced).
.....
----------------------------------------------------------------------
Ran 5 tests in 0.014s

OK
Destroying test database for alias 'default'...
Client Testing
When creating web applications, we will probably want to check not just whether or not specific functions work, but also whether or not individual web pages load as intended. We can do this by creating a Client object in our Django testing class, and then making requests using that object. To do this, we’ll first have to add Client to our imports:
from django.test import Client, TestCase
For example, let’s now add a test that makes sure that we get an HTTP response code of 200 and that all three of our flights are added to the context of a response:
def test_index(self):

    # Set up client to make requests
    c = Client()

    # Send get request to index page and store response
    response = c.get("/flights/")

    # Make sure status code is 200
    self.assertEqual(response.status_code, 200)

    # Make sure three flights are returned in the context
    self.assertEqual(response.context["flights"].count(), 3)
We can similarly check to make sure we get a valid response code for a valid flight page, and an invalid response code for a flight page that doesn’t exist. (Notice that we use the Max function to find the maximum id, which we have access to by including from django.db.models import Max at the top of our file)
def test_valid_flight_page(self):
    a1 = Airport.objects.get(code="AAA")
    f = Flight.objects.get(origin=a1, destination=a1)

    c = Client()
    response = c.get(f"/flights/{f.id}")
    self.assertEqual(response.status_code, 200)

def test_invalid_flight_page(self):
    max_id = Flight.objects.all().aggregate(Max("id"))["id__max"]

    c = Client()
    response = c.get(f"/flights/{max_id + 1}")
    self.assertEqual(response.status_code, 404)
Finally, let’s add some testing to make sure the passengers and non-passengers lists are being generated as expected:
def test_flight_page_passengers(self):
    f = Flight.objects.get(pk=1)
    p = Passenger.objects.create(first="Alice", last="Adams")
    f.passengers.add(p)

    c = Client()
    response = c.get(f"/flights/{f.id}")
    self.assertEqual(response.status_code, 200)
    self.assertEqual(response.context["passengers"].count(), 1)

def test_flight_page_non_passengers(self):
    f = Flight.objects.get(pk=1)
    p = Passenger.objects.create(first="Alice", last="Adams")

    c = Client()
    response = c.get(f"/flights/{f.id}")
    self.assertEqual(response.status_code, 200)
    self.assertEqual(response.context["non_passengers"].count(), 1)
Now, we can run all of our tests together, and see that at the moment we have no errors!
Creating test database for alias 'default'...
System check identified no issues (0 silenced).
..........
----------------------------------------------------------------------
Ran 10 tests in 0.048s

OK
Destroying test database for alias 'default'...
Selenium
So far, we’ve been able to test out the server-side code we’ve written using Python and Django, but as we’re building up our applications we’ll want the ability to create tests for our client-side code as well. For example, let’s think back to our counter.html page and work on writing some tests for it.
We’ll begin by writing a slightly different counter page where we include a button to decrease the count:
<!DOCTYPE html>
<html lang="en">
    <head>
        <title>Counter</title>
        <script>

            // Wait for page to load
            document.addEventListener('DOMContentLoaded', () => {

                // Initialize variable to 0
                let counter = 0;

                // If increase button clicked, increase counter and change inner html
                document.querySelector('#increase').onclick = () => {
                    counter ++;
                    document.querySelector('h1').innerHTML = counter;
                }

                // If decrease button clicked, decrease counter and change inner html
                document.querySelector('#decrease').onclick = () => {
                    counter --;
                    document.querySelector('h1').innerHTML = counter;
                }
            })
        </script>
    </head>
    <body>
        <h1>0</h1>
        <button id="increase">+</button>
        <button id="decrease">-</button>
    </body>
</html>
Now if we wish to test this code, we could just open up our web browser, click the two buttons, and observe what happens. This, however, would become very tedious as you write larger and larger single page applications, which is why several frameworks have been created that help with in-browser testing, one of which is called Selenium.
Using Selenium, we’ll be able to define a testing file in Python where we can simulate a user opening a web browser, navigating to our page, and interacting with it. Our main tool when doing this is known as a Web Driver, which will open up a web browser on your computer. Let’s take a look at how we could start using this library to begin interacting with pages. Note that below we use both selenium and ChromeDriver. Selenium can be installed for python by running pip install selenium, and ChromeDriver can be installed by running pip install chromedriver-py
import os
import pathlib
import unittest

from selenium import webdriver

# Finds the Uniform Resourse Identifier of a file
def file_uri(filename):
    return pathlib.Path(os.path.abspath(filename)).as_uri()

# Sets up web driver using Google chrome
driver = webdriver.Chrome()
The above code is all of the basic setup we need, so now we can get into some more interesting uses by employing the Python interpreter. One note about the first few lines is that in order to target a specific page, we need that page’s Uniform Resource Identifier (URI) which is a unique string that represents that resource.
# Find the URI of our newly created file
>>> uri = file_uri("counter.html")

# Use the URI to open the web page
>>> driver.get(uri)

# Access the title of the current page
>>> driver.title
'Counter'

# Access the source code of the page
>>> driver.page_source
'<html lang="en"><head>\n        <title>Counter</title>\n        <script>\n            \n            // Wait for page to load\n            document.addEventListener(\'DOMContentLoaded\', () => {\n\n                // Initialize variable to 0\n                let counter = 0;\n\n                // If increase button clicked, increase counter and change inner html\n                document.querySelector(\'#increase\').onclick = () => {\n                    counter ++;\n                    document.querySelector(\'h1\').innerHTML = counter;\n                }\n\n                // If decrease button clicked, decrease counter and change inner html\n                document.querySelector(\'#decrease\').onclick = () => {\n                    counter --;\n                    document.querySelector(\'h1\').innerHTML = counter;\n                }\n            })\n        </script>\n    </head>\n    <body>\n        <h1>0</h1>\n        <button id="increase">+</button>\n        <button id="decrease">-</button>\n    \n</body></html>'

# Find and store the increase and decrease buttons:
>>> increase = driver.find_element_by_id("increase")
>>> decrease = driver.find_element_by_id("decrease")

# Simulate the user clicking on the two buttons
>>> increase.click()
>>> increase.click()
>>> decrease.click()

# We can even include clicks within other Python constructs:
>>> for i in range(25):
...     increase.click()
Now let’s take a look at how we can use this simulation to create automated tests of our page:
# Standard outline of testing class
class WebpageTests(unittest.TestCase):

    def test_title(self):
        """Make sure title is correct"""
        driver.get(file_uri("counter.html"))
        self.assertEqual(driver.title, "Counter")

    def test_increase(self):
        """Make sure header updated to 1 after 1 click of increase button"""
        driver.get(file_uri("counter.html"))
        increase = driver.find_element_by_id("increase")
        increase.click()
        self.assertEqual(driver.find_element_by_tag_name("h1").text, "1")

    def test_decrease(self):
        """Make sure header updated to -1 after 1 click of decrease button"""
        driver.get(file_uri("counter.html"))
        decrease = driver.find_element_by_id("decrease")
        decrease.click()
        self.assertEqual(driver.find_element_by_tag_name("h1").text, "-1")

    def test_multiple_increase(self):
        """Make sure header updated to 3 after 3 clicks of increase button"""
        driver.get(file_uri("counter.html"))
        increase = driver.find_element_by_id("increase")
        for i in range(3):
            increase.click()
        self.assertEqual(driver.find_element_by_tag_name("h1").text, "3")

if __name__ == "__main__":
    unittest.main()
Now, if we run python tests.py, our simulations will be carried out in the browser, and then the results of the tests will be printed to the console. Here’s an example of what this might look like when we have a bug in the code a test fails:
CI/CD
CI/CD, which stands for Continuous Integration and Continuous Delivery, is a set of software development best practices that dictate how code is written by a team of people, and how that code is later delivered to users of the application. As the name implies, this method consists of two main parts:
- Continuous Integration:
- Frequent merges to the main branch
- Automated unit testing with each merge
- Continuous Delivery:
- Short release schedules, meaning new versions of an application are released frequently.
CI/CD has become more and more popular among software development teams for a number of reasons:
- When different team members are working on different features, many compatibility issues can arise when multiple features are combined at the same time. Continuous integration allows teams to tackle small conflicts as they come.
- Because unit tests are run with each Merge, when a test fails it is easier to isolate the part of the code that is causing the problem.
- Frequently releasing new versions of an application allows developers to isolate problems if they arise after launch.
- Releasing small, incremental changes allows users to slowly get used to new app features rather than being overwhelmed with an entirely different version
- Not waiting to release new features allows companies to stay ahead in a competitive market.
GitHub Actions
One popular tool used to help with continuous integration is known as GitHub Actions. GitHub Actions will allow us to create workflows where we can specify certain actions to be performed every time someone pushes to a git repository. For example, we might want to check with every push that a style guide is adhered to, or that a set of unit tests is passed.
In order to set up a GitHub action, we’ll use a configuration language called YAML. YAML structures its data around key-value pairs (like a JSON object or Python Dictionary). Here’s an example of a simple YAML file:
key1: value1
key2: value2
key3:
    - item1
    - item2
    - item3
Now, let’s look at an example of how we would configure a YAML file (which takes the form name.yml or name.yaml) that works with GitHub Actions. To do this, I’ll create a .github directory in my repository, and then a workflows directory inside of that, and finally a ci.yml file within that. In that file, we’ll write:
name: Testing
on: push

jobs:
  test_project:
    runs-on: ubuntu-latest
    steps:
    - uses: actions/checkout@v2
    - name: Run Django unit tests
      run: |
        pip3 install --user django
        python3 manage.py test
Since this is our first time using GitHub Actions, let’s go through what each part of this file is doing:
- First, we give the workflow a
name, which in our case is Testing. - Next, with the
onkey, we specify when the workflow should run. In our case, we wish to perform the tests every time someone pushes to the repository. - The rest of the file is contained within a
jobskey, which indicates which jobs should be run at every push.- In our case, the only job is
test_project. Every job must define two componenets- The
runs-onkey specifies which of GitHub’s virtual machines we would like our code to be run on. - The
stepskey provides the actions that should occur when this job is run- In the
useskey we specify which GitHub action we wish to use.actions/checkout@v2is an action written by GitHub that we can use. - The
namekey here allows us to proide a description of the action we’re taking - After the
runkey, we type the commands we wish to run on GitHub’s server. In our case we wish to install Django and then run the testing file.
- In the
- The
- In our case, the only job is
Now, let’s open up our repository in GitHub and take a look at some of the tabs near the top of the page:
- Code: This is the tab that we’ve been using most frequently, as it allows us to view the files and folders within our directory.
- Issues: Here we can open and close issues, which are requests for bug fixes or new features. We can think of this as a to-do list for our application.
- Pull Requests: Requests from people who wish to merge some code from one branch into another one. This is a useful tool, as it allows people to perform code reviews where they comment and provide suggestions before code is integrated into the master branch.
- GitHub Actions: This is the tab we’ll use when working on continuous integration, as it provides logs of the actions that have taken place after each push.
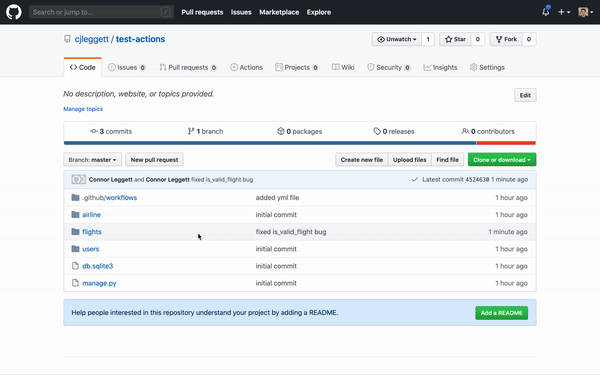
Here, let’s imagine that we pushed our changes before we fixed the bug we had in the is_valid_flight function in models.py within our airport project. We can now navigate to the GitHub Actions tab, click on our most recent push, click on the action that failed, and view the log:

Now, after fixing the bug, we could bush again and find a better outcome:
Docker
Problems can arise in the world of software development when the configuration on your computer is different than the one your application is being run on. You may have a different version of Python or some additional packages installed that allow the application to run smoothly on your computer, while it would crash on your server. To avoid these problems, we need a way to make sure everyone working on a project is using the same environment. One way to do this is to use a tool called Docker, which is a containerization software, meaning it creates an isolated environment within your computer that can be standardized among many collaborators and the server on which your site is run. While Docker is a bit like a Virtual Machine, they are in fact different technologies. A virtual machine (like the one used on GitHub Actions or when you launch an AWS server) is effectively an entire virtual computer with its own operating system, meaning it ends up taking a lot of space wherever it is running. Dockers, on the other hand, work by setting up a container within an existing computer, therefore taking up less space.
Now that we have an idea of what a Docker container is, let’s take a look at how we can configure one on our computers. Our first step in doing this will be to create a Docker File which we’ll name Dockerfile. Inside this file, we’ll provide instructions for how to create a Docker Image which describes the libraries and binaries we wish to include in our container. Here’s an example of what our Dockerfile might look like:
FROM python:3
COPY .  /usr/src/app
WORKDIR /usr/src/app
RUN pip install -r requirements.txt
CMD ["python3", "manage.py", "runserver", "0.0.0.0:8000"]
Here, we’ll take an in-depth look at what the above file actually does:
-
FROM python3: this shows that we are basing this image off of a standard image in which Python 3 is installed. This is fairly common when writing a Docker File, as it allows you to avoid the work of re-defining the same basic setup with each new image. -
COPY . /usr/src/app: This shows that we wish to copy everything from our current directory (.) and store it in the/usr/src/appdirectory in our new container. -
WORKDIR /usr/src/app: This sets up where we will run commands within the container. (A bit likecdon the terminal) -
RUN pip install -r requirements.txt: In this line, assuming you’ve included all of your requirements to a file calledrequirements.txt, they will all be installed within the container. -
CMD ["python3", "manage.py", "runserver", "0.0.0.0:8000"]: Finally, we specify the command that should be run when we start up the container.
So far in this class, we’ve only been using SQLite as that’s the default database management system for Django. In live applications with real users though, SQLite is almost never used, as it is not as easily scaled as other systems. Thankfully, if we wish to run a separate server for our database, we can simply add another Docker container, and run them together using a feature called Docker Compose. This will allow two different servers to run in separate containers, but also be able to communicate with one another. To specify this, we’ll use a YAML file called docker-compose.yml:
version: '3'

services:
    db:
        image: postgres

    web:
        build: .
        volumes:
            - .:/usr/src/app
        ports:
            - "8000:8000"
In the above file we:
- Specify that we’re using version 3 of Docker Compose
- Outline two services:
-
dbsets up our database container based on an image already written by Postgres. -
websets up our server’s container by instructing Docker to:- Use the Dockerfile within the current directory.
- Use the specified path within the container.
- Link port 8000 within the container to port 8000 on our computer.
-
Now, we’re ready to start up our services with the command docker-compose up. This will launch both of our servers inside of new Docker containers.
At this point, we may want to run commands within our Docker container to add database entries or run tests. To do this, we’ll first run docker ps to show all of the docker containers that are running. Then, well find the CONTAINER ID of the container we wish to enter and run docker exec -it CONTAINER_ID bash -l. This will move you inside the usr/src/app directory we set up within our container. We can run any commands we wish inside that container and then exit by running CTRL-D.
That’s all for this lecture! Next time, we’ll working on scaling up our projects and making sure they are secure.