Birthdays
Problem to Solve
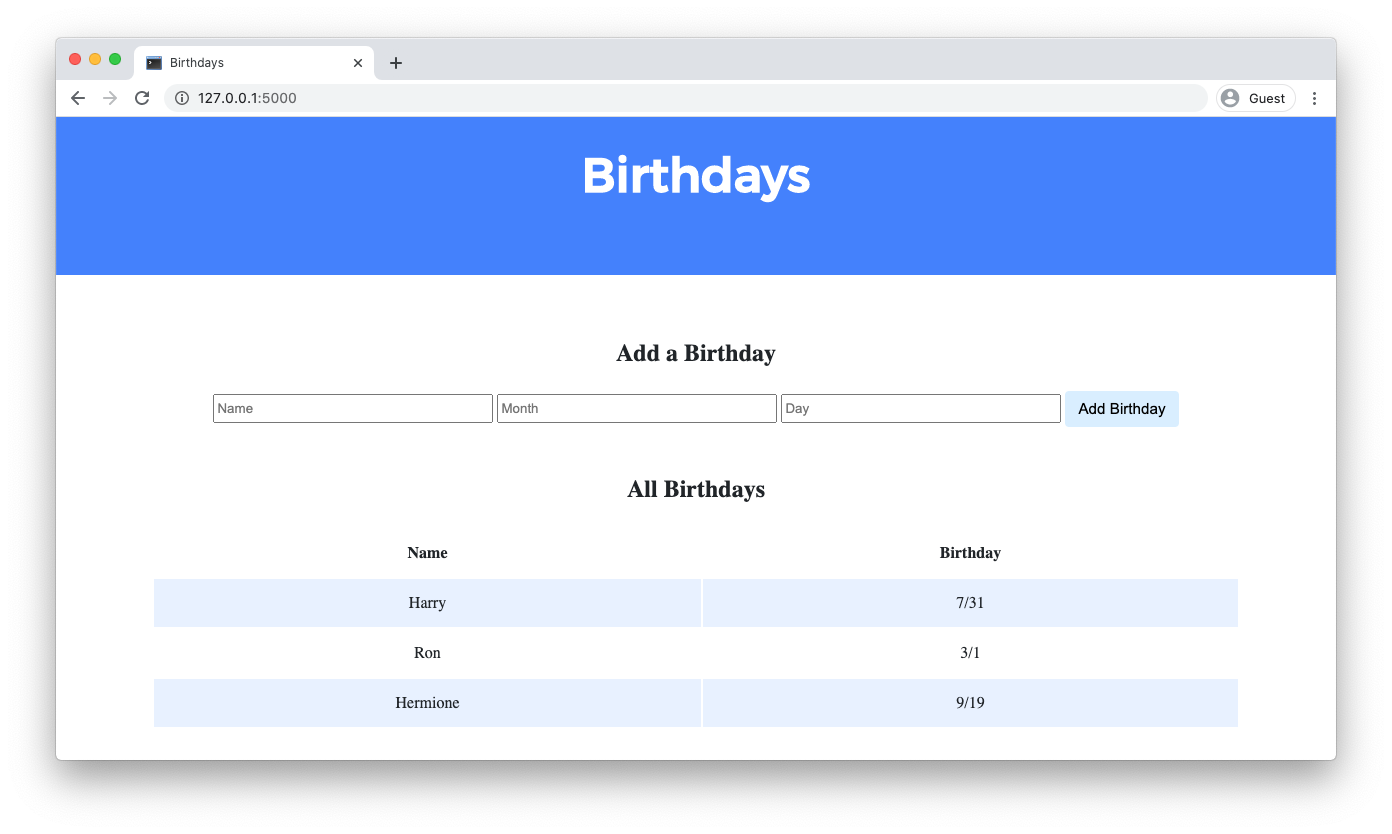
Create a web application to keep track of friends’ birthdays.
Getting Started
Download the distribution code
Open VS Code.
Start by clicking inside your terminal window, then execute cd by itself. You should find that its “prompt” resembles the below.
$
Click inside of that terminal window and then execute
wget https://cdn.cs50.net/2023/fall/psets/9/birthdays.zip
followed by Enter in order to download a ZIP called birthdays.zip in your codespace. Take care not to overlook the space between wget and the following URL, or any other character for that matter!
Now execute
unzip birthdays.zip
to create a folder called birthdays. You no longer need the ZIP file, so you can execute
rm birthdays.zip
and respond with “y” followed by Enter at the prompt to remove the ZIP file you downloaded.
Now type
cd birthdays
followed by Enter to move yourself into (i.e., open) that directory. Your prompt should now resemble the below.
birthdays/ $
If all was successful, you should execute
ls
and you should see the following files and folders:
app.py birthdays.db static/ templates/
If you run into any trouble, follow these same steps again and see if you can determine where you went wrong!
Understanding
In app.py, you’ll find the start of a Flask web application. The application has one route (/) that accepts both POST requests (after the if) and GET requests (after the else). Currently, when the / route is requested via GET, the index.html template is rendered. When the / route is requested via POST, the user is redirected back to / via GET.
birthdays.db is a SQLite database with one table, birthdays, that has four columns: id, name, month, and day. There are a few rows already in this table, though ultimately your web application will support the ability to insert rows into this table!
In the static directory is a styles.css file containing the CSS code for this web application. No need to edit this file, though you’re welcome to if you’d like!
In the templates directory is an index.html file that will be rendered when the user views your web application.
Implementation Details
Complete the implementation of a web application to let users store and keep track of birthdays.
- When the
/route is requested viaGET, your web application should display, in a table, all of the people in your database along with their birthdays.- First, in
app.py, add logic in yourGETrequest handling to query thebirthdays.dbdatabase for all birthdays. Pass all of that data to yourindex.htmltemplate. - Then, in
index.html, add logic to render each birthday as a row in the table. Each row should have two columns: one column for the person’s name and another column for the person’s birthday.
- First, in
- When the
/route is requested viaPOST, your web application should add a new birthday to your database and then re-render the index page.- First, in
index.html, add an HTML form. The form should let users type in a name, a birthday month, and a birthday day. Be sure the form submits to/(its “action”) with a method ofpost. - Then, in
app.py, add logic in yourPOSTrequest handling toINSERTa new row into thebirthdaystable based on the data supplied by the user.
- First, in
Optionally, you may also:
- Add the ability to delete and/or edit birthday entries.
- Add any additional features of your choosing!
Hints
Click the below toggles to read some advice!
Create a form via which users can submit birthdays
In index.html, notice the following TODO:
<!-- TODO: Create a form for users to submit a name, a month, and a day -->
Recall that, to create a form, you can use the form HTML element. You can create a form HTML element with the following opening and closing tags:
<form>
</form>
Of course, a form still needs input fields (and a button via which the user can submit the form!). Recall that HTML input elements create, among other things, input boxes within a form. You can specify their type attribute to allow them to accept text or numbers. Also give the input elements a name attribute so you can differentiate them.
<form>
    <input name="name" type="text">
    <input name="month" type="number">
    <input name="day" type="number">
</form>
Your form might benefit from a button the user could click to submit their data. Add an input element of type submit, which will allow the user to do just that. If you’d like the button itself to have explanatory text, try setting the value attribute.
<form>
    <input name="name" type="text">
    <input name="month" type="number">
    <input name="day" type="number">
    <input type="submit" value="Add Birthday">
</form>
Where will the user’s data be submitted? Currently, nowhere! Recall that you can specify a form’s action attribute to dictate which route should be requested after the form is submitted. The form data will be submitted along with the resulting request. The method attribute specifies which HTTP request method to use when submitting the form.
<form action="/" method="post">
    <input name="name" type="text">
    <input name="month" type="number">
    <input name="day" type="number">
    <input type="submit" value="Add Birthday">
</form>
With that, your form should be perfectly functional, though it could still be improved! Consider adding placeholder values to spruce things up a bit:
<form action="/" method="post">
    <input name="name" placeholder="Name" type="text">
    <input name="month" placeholder="Month" type="number">
    <input name="day" placeholder="Day" type="number">
    <input type="submit" value="Add Birthday">
</form>
And consider adding some client-side validation, to ensure the user cooperates with the intent of your form. For example, an input field of type number can also have a min and max attribute specified, which determine the minimum and maximum value a user can enter.
<form action="/" method="post">
    <input name="name" placeholder="Name" type="text">
    <input name="month" placeholder="Month" type="number" min="1" max="12">
    <input name="day" placeholder="Day" type="number" min="1" max="31">
    <input type="submit" value="Add Birthday">
</form>
Add a user's form submission to the database
In app.py, notice the following TODO:
# TODO: Add the user's entry into the database
Recall that Flask has some handy methods to access form data submitted via POST! In particular:
# Access form data
request.form.get(NAME)
where NAME refers to the name attribute of the particular input element with submitted data. If your input elements were named name, month, and day, you could access (and store!) their values respectively with the following:
# Access form data
name = request.form.get("name")
month = request.form.get("month")
day = request.form.get("day")
Now the values submitted by the user in the name, month, and day input elements are available to you as Python variables.
The next step is to add these values to your database! Thanks to this particular line
db = SQL("sqlite:///birthdays.db")
app.py has already established a connection to birthdays.db under the name db. You can now execute SQL queries by calling db.execute with a valid SQL query. If you wanted to add Carter’s birthday on January 1st, you might run the following SQL statement:
INSERT INTO birthdays (name, month, day) VALUES('Carter', 1, 1);
Configure app.py to run that same query, but with placeholders for the values to insert, as follows:
# Access form data
name = request.form.get("name")
month = request.form.get("month")
day = request.form.get("day")

# Insert data into database
db.execute("INSERT INTO birthdays (name, month, day) VALUES(?, ?, ?)", name, month, day)
And that should do it! Try submitting the form, opening birthdays.db, and using a SELECT query to view the contents of the birthdays table. You should see the submitted form data available to you.
As you create more advanced applications, you’ll also want to add server-side validation: that is, a way to check whether the user’s data is valid before doing anything else! One of the first validations you might make is whether the user submitted any data at all! Should you try to retrieve form data with request.form.get where the user didn’t submit any, request.form.get will return an empty string. You can check for this value in Python as follows:
# Access form data
name = request.form.get("name")
if not name:
    return redirect("/")

month = request.form.get("month")
if not month:
    return redirect("/")

day = request.form.get("day")
if not day:
    return redirect("/")

# Insert data into database
db.execute("INSERT INTO birthdays (name, month, day) VALUES(?, ?, ?)", name, month, day)
Now, you won’t insert a row until you’re sure the user has provided all the data you need.
A few more things could still go wrong! What if the user doesn’t, in fact, provide a numeric value for month or day? One way to check is to try to convert the value to an integer with int and, if the conversion fails, to redirect the user back to the homepage.
# Access form data
name = request.form.get("name")
if not name:
    return redirect("/")

month = request.form.get("month")
if not month:
    return redirect("/")
try:
    month = int(month)
except ValueError:
    return redirect("/")

day = request.form.get("day")
if not day:
    return redirect("/")
try:
    day = int(day)
except ValueError:
    return redirect("/")

# Insert data into database
db.execute("INSERT INTO birthdays (name, month, day) VALUES(?, ?, ?)", name, month, day)
And even if the user has entered a number, best to check it’s in the right range!
# Access form data
name = request.form.get("name")
if not name:
    return redirect("/")

month = request.form.get("month")
if not month:
    return redirect("/")
try:
    month = int(month)
except ValueError:
    return redirect("/")
if month < 1 or month > 12:
    return redirect("/")

day = request.form.get("day")
if not day:
    return redirect("/")
try:
    day = int(day)
except ValueError:
    return redirect("/")
if day < 1 or day > 31:
    return redirect("/")

# Insert data into database
db.execute("INSERT INTO birthdays (name, month, day) VALUES(?, ?, ?)", name, month, day)
Render birthdays in birthdays.db
Once a user can submit birthdays and store them in birthdays.db, your next task is to ensure those birthdays are rendered in index.html.
First, you’ll need to retrieve all birthdays from birthdays.db. You could so with the SQL query:
SELECT * FROM birthdays;
See the following TODO in app.py:
# TODO: Display the entries in the database on index.html
Consider configuring app.py to run this SQL query each time the page is loaded with a GET request:
# Query for all birthdays
birthdays = db.execute("SELECT * FROM birthdays")
Now, all birthdays in the birthdays table of birthdays.db are available to you in a Python variable named birthdays. In particular, the results of the SQL query are stored as a list of dictionaries. Each dictionary represents one row returned by the query, and each key in the dictionary corresponds to a column name of the birthdays table (i.e., “name”, “month”, and “day”).
To render these birthdays in index.html, you can rely on Flask’s render_template function. You can specify that index.html should be rendered with the birthdays variable by specifying a keyword argument, also called birthdays, and setting it equal to the birthdays variable you just recently created.
# Query for all birthdays
birthdays = db.execute("SELECT * FROM birthdays")

# Render birthdays page
return render_template("index.html", birthdays=birthdays)
To be clear, the name on the left-hand side of the =, birthdays, is the name under which you can access the birthdays data within index.html itself.
Now that index.html is being rendered with access to the birthdays data, you can use Jinja to render the data properly. Jinja, like Python, can loop through elements of a list. And Jinja, like Python, can access elements a dictionary by their keys. In this case, the Jinja syntax to do so is the name of the dictionary, followed by a ., then the name of the key to access.
{% for birthday in birthdays %}
    <tr>
        <td></td>
        <td>/</td>
    </tr>
{% endfor %}
And that’s it! Try reloading the page to see the birthdays rendered.
Walkthrough
This video was recorded when the course was still using CS50 IDE for writing code. Though the interface may look different from your codespace, the behavior of the two environments should be largely similar!
Not sure how to solve?
Testing
No check50 for this problem set! But be sure to test your web application by adding some birthdays and ensuring that the data appears in your table as expected.
Run flask run in your terminal while in your birthdays directory to start a web server that serves your Flask application.
How to Submit
submit50 cs50/problems/2024/x/birthdays