Smiley
Learning Goals
- Learn how to work with images
- Practice manipulating pixels
Background
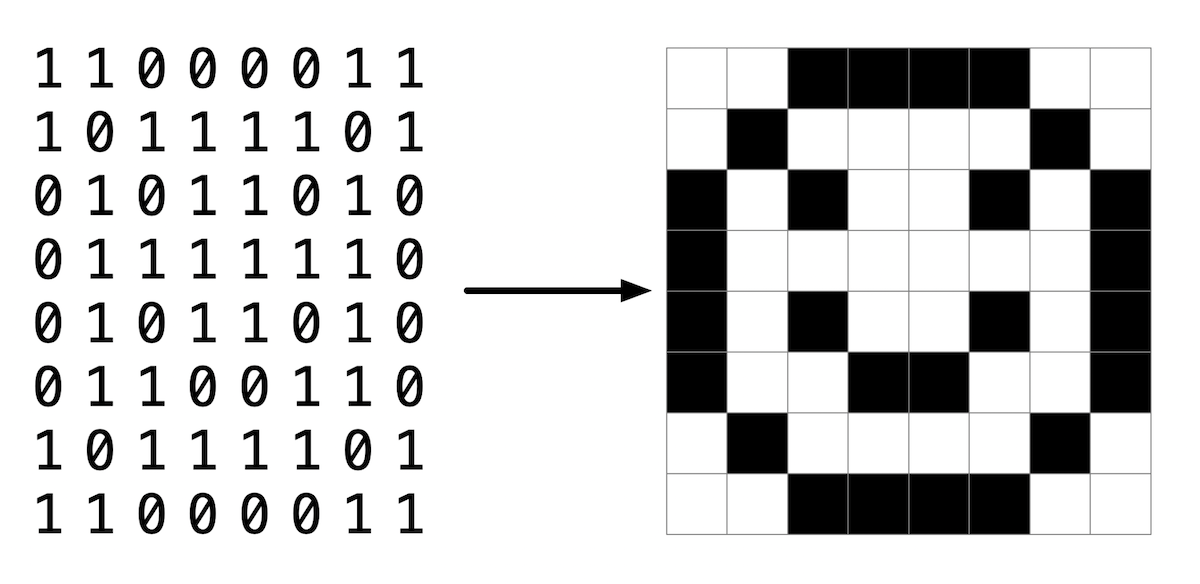
You’ve seen in lecture a bit about how images are stored on a computer. In this lab, you’ll practice working with a BMP file, actually the smiley face pictured here, and change all the black pixels to red.
However, the smiley face you’ll be working with is not just made of of 0’s and 1’s, or black and white pixels, but consists of 24 bits per pixel. It uses eight bits to represent red values, eight bits for green and eight bits for blue. Since each color uses eight bits or one byte, we can use a number in the range of 0 to 255 to represent its color value. In hexadecimal, this is represented by 0x00 to 0xff. By mixing together these red, green and blue values, we can create millions of possible colors.
If you look at bmp.h, one of the the helper files in the distribution code, you’ll see how each RGB triple is represented by a struct like:
typedef struct
{
    BYTE rgbtBlue;
    BYTE rgbtGreen;
    BYTE rgbtRed;
}
RGBTRIPLE;
where BYTE is defined as an 8-bit integer.
You’ll notice several files provided in the distribution code to handle the reading and writing of an image file, as well as handling the image’s
metadate or “headers”. You’ll be completing the function colorize in helpers.c, which already has as input parameters, the image’s height, width,
and a two-dimensional array of RGBTRIPLE’s which create the image itself.
- Hints
- If were were to save the first pixel as
RBGTRIPLE pixel = image[0][0]we could then access each of the individual colors ofpixelaspixel.rbgtBlue,pixel.rbgtGreen, andpixel.rbgtRed.
- If were were to save the first pixel as
Demo

Getting Started
- Log into code.cs50.io using your GitHub account.
- Click inside the terminal window and execute
cd. - Then copy and paste
wget TODOinto your terminal to download this lab’s distribution code. - At the
$prompt, typeunzip smiley.zipto create a folder calledsmiley. - You no longer need the ZIP file, so execute
rm smiley.zipand respondyat the prompt. - Now type
cd smileyto move into that directory. - If you now type
lsyou will see several files. - You are to complete the function,
colorize, inhelpers.c.
Implementation Details
Open up helpers.c and notice that the colorize function is incomplete. Note that the image’s height, width and a two-dimensional array of pixels is
set up as the input parameters for this function. You are to implement this function to change all the black pixels in the image to red.
You can compile your code by simply typing make at the $ prompt.
You then execute the program by typing:
./colorize smiley.bmp outfile.bmp
where outfile.bmp is the name of the new bmp you are creating.
Thought Question
- How do you think you represent a black pixel when using a 24-bit color BMP file?
- Is this the same or different when mixing paints to repesent various colors?
How to Test Your Code
Your program should behave per the examples below.
smiley/ $ ./colorize smiley.bmp red_smiley.bmp
When your program is working correctly, you should see a new file, red_smiley.bmp in your smiley directory. Open it up and see if the black pixels are
now red.
You can check your code using check50, a program that CS50 will use to test your code when you submit, by typing in the following at the $ prompt. But be sure to test it yourself as well!
TODO
Green smilies mean your program has passed a test! Red frownies will indicate your program output something unexpected. Visit the URL that check50 outputs to see the input check50 handed to your program, what output it expected, and what output your program actually gave.
To evaluate that the style of your code (indentations and spacing) is correct, type in the following at the $ prompt.
style50 smiley.c
How to Submit
In your terminal, execute the below to submit your work.
TODO